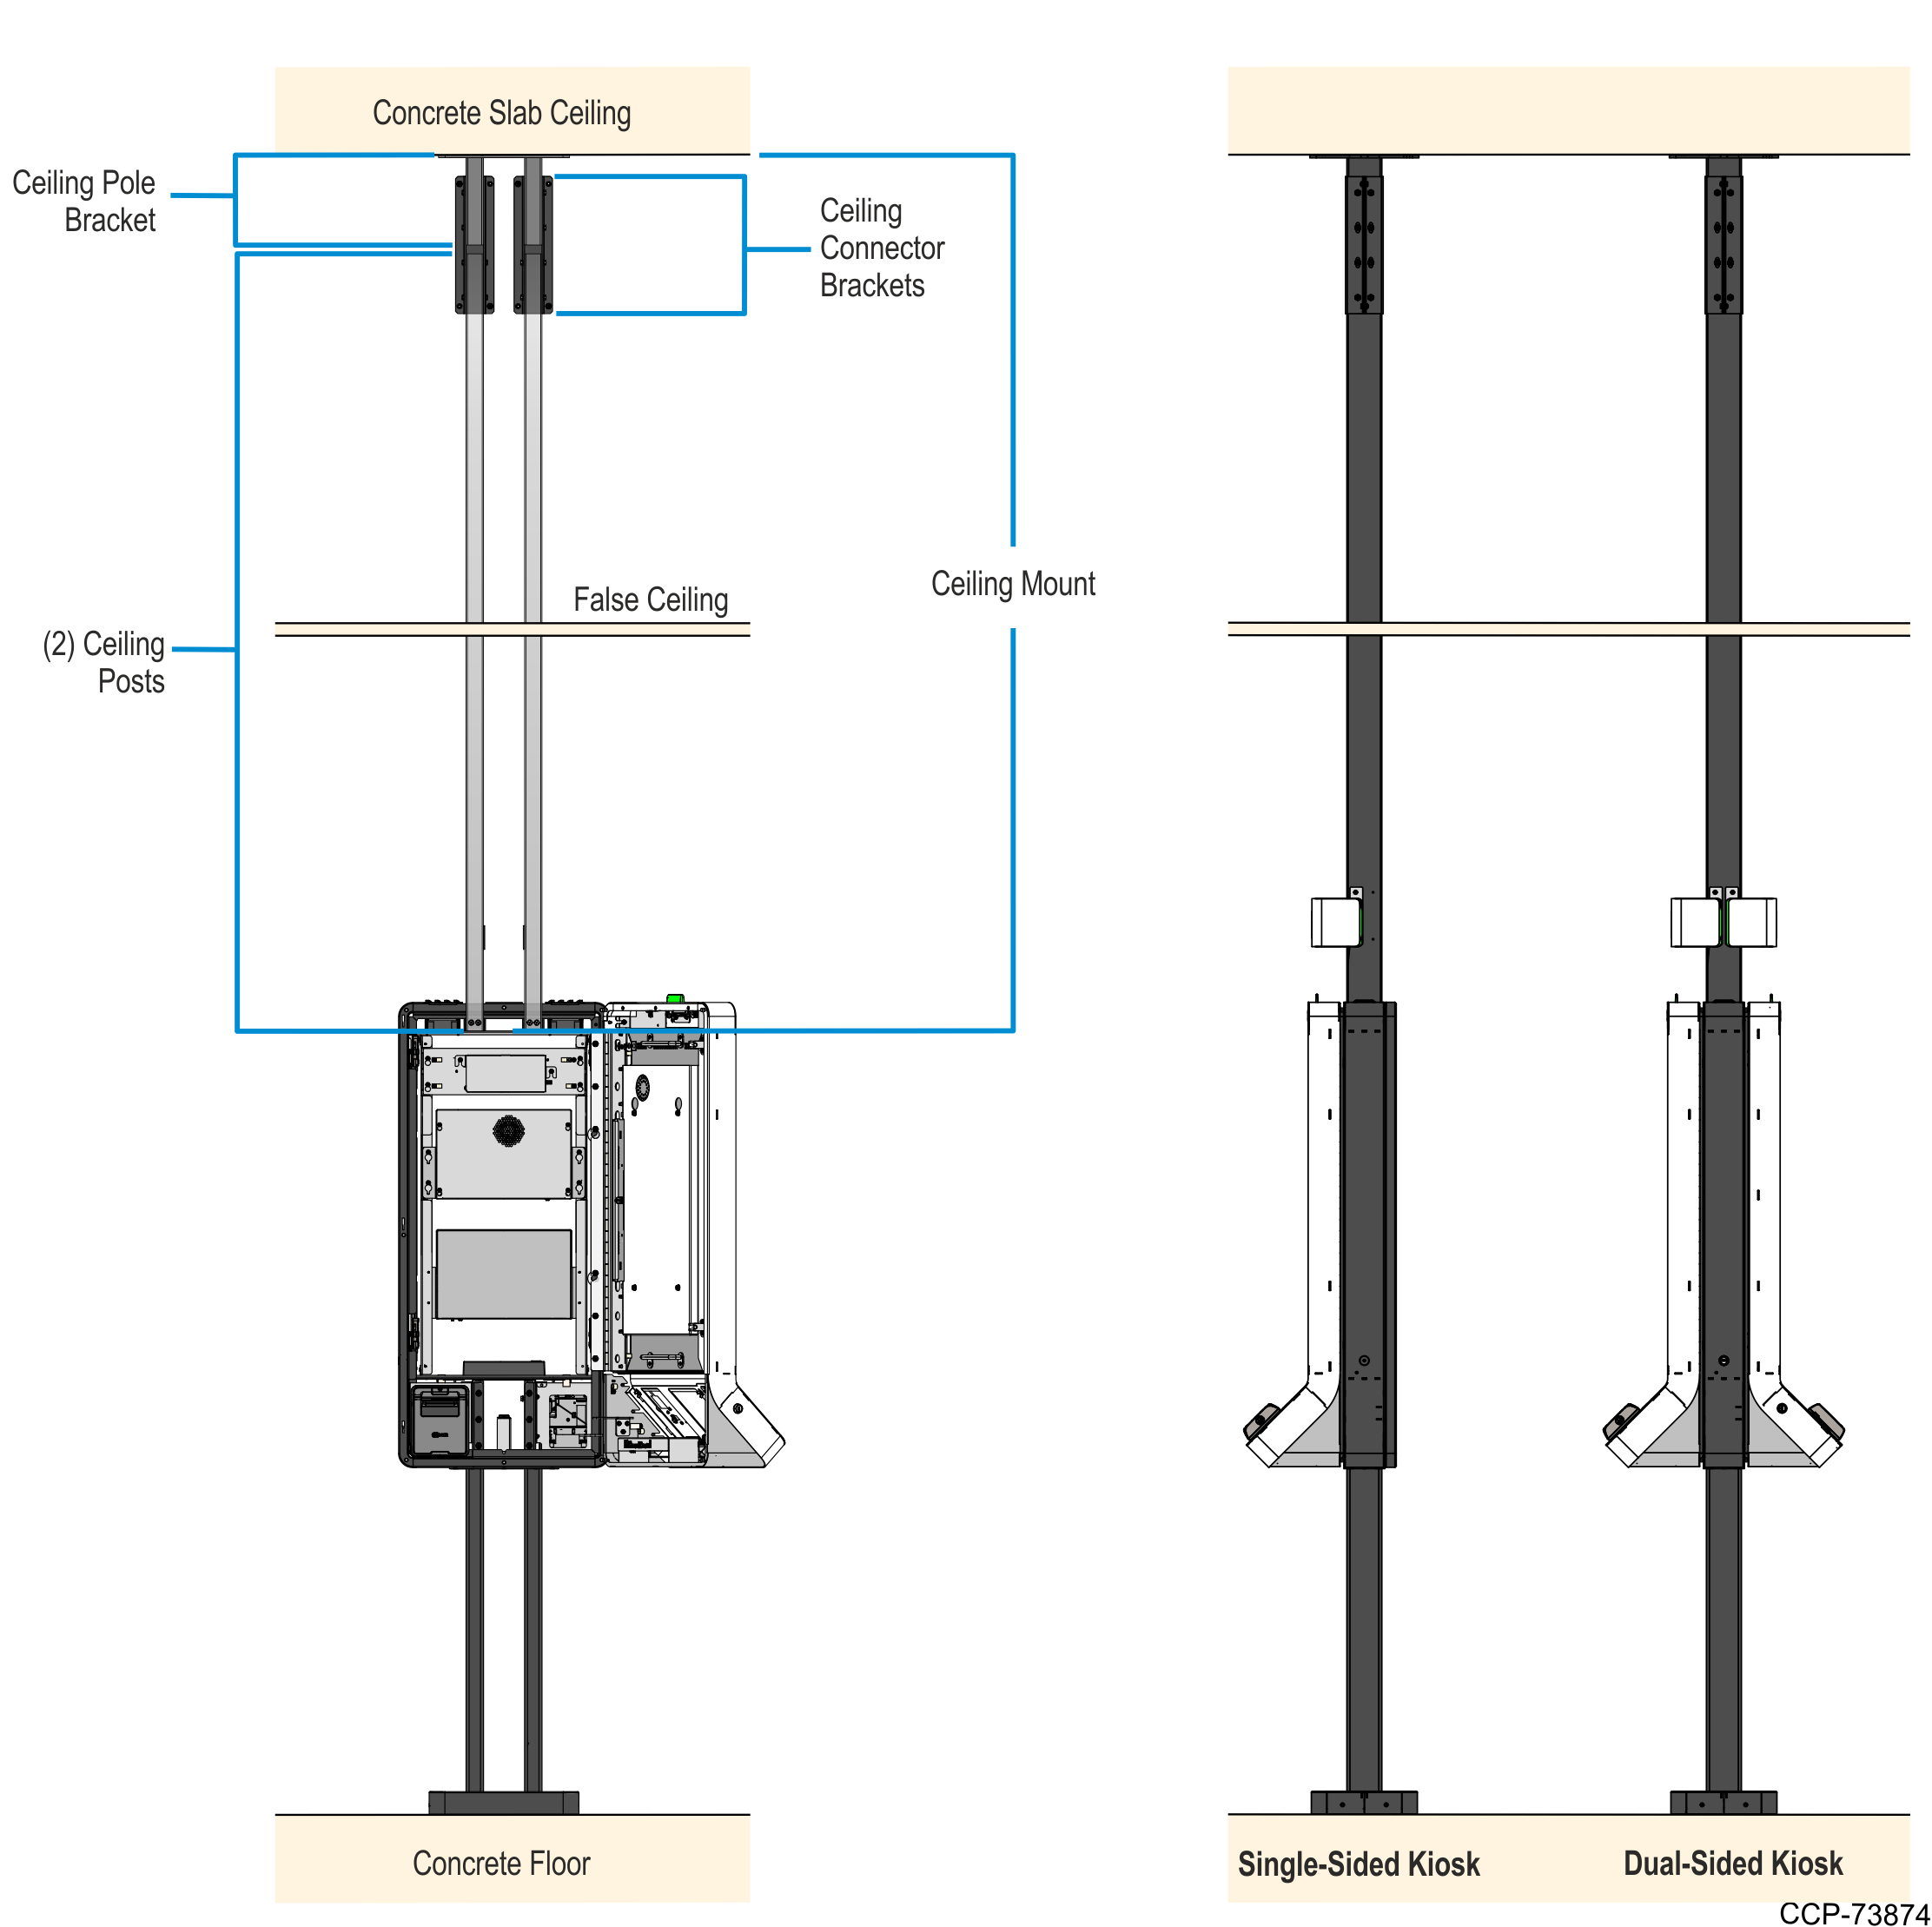
Marking and Drilling Ceiling Mounting Holes
Marking mounting holes for the Ceiling Mount assembly requires at least two persons and the use of a step ladder or a work platform.
Make sure that the Ceiling Posts are cut to the appropriate length, see Cutting the Ceiling Posts for more information.
To mark and drill mounting holes for the Ceiling Mount, perform the following steps:
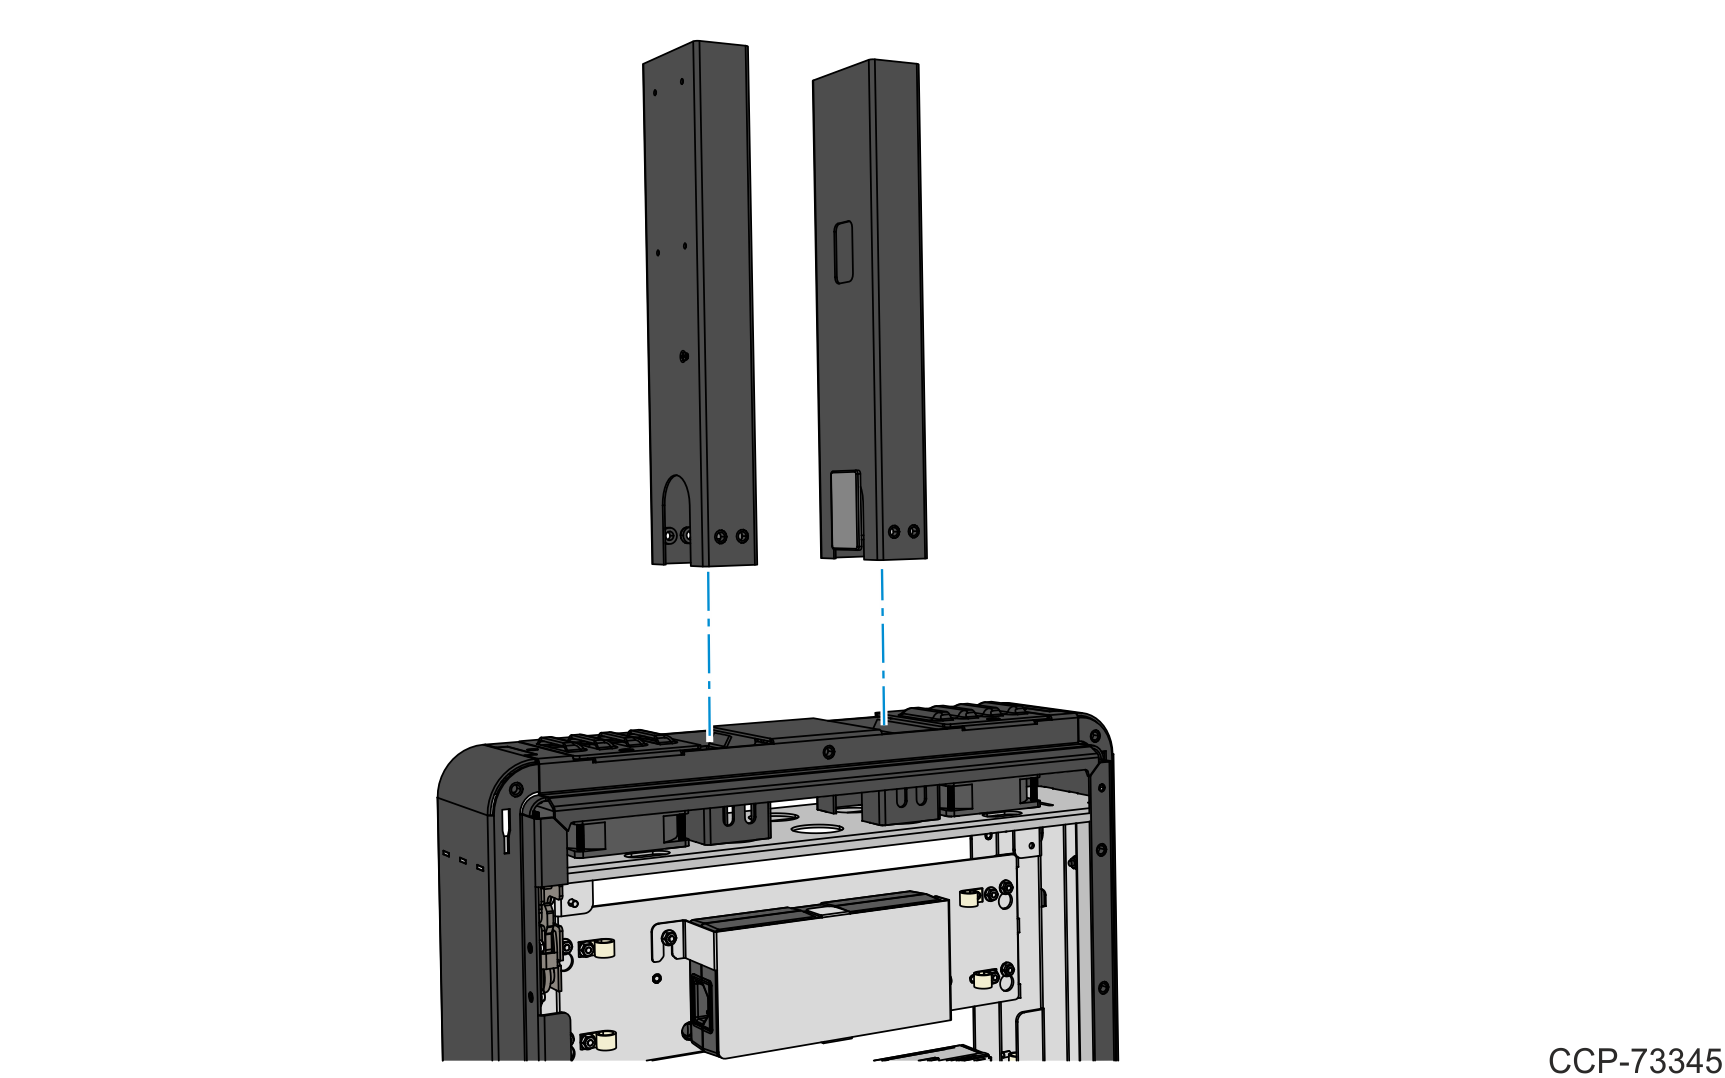
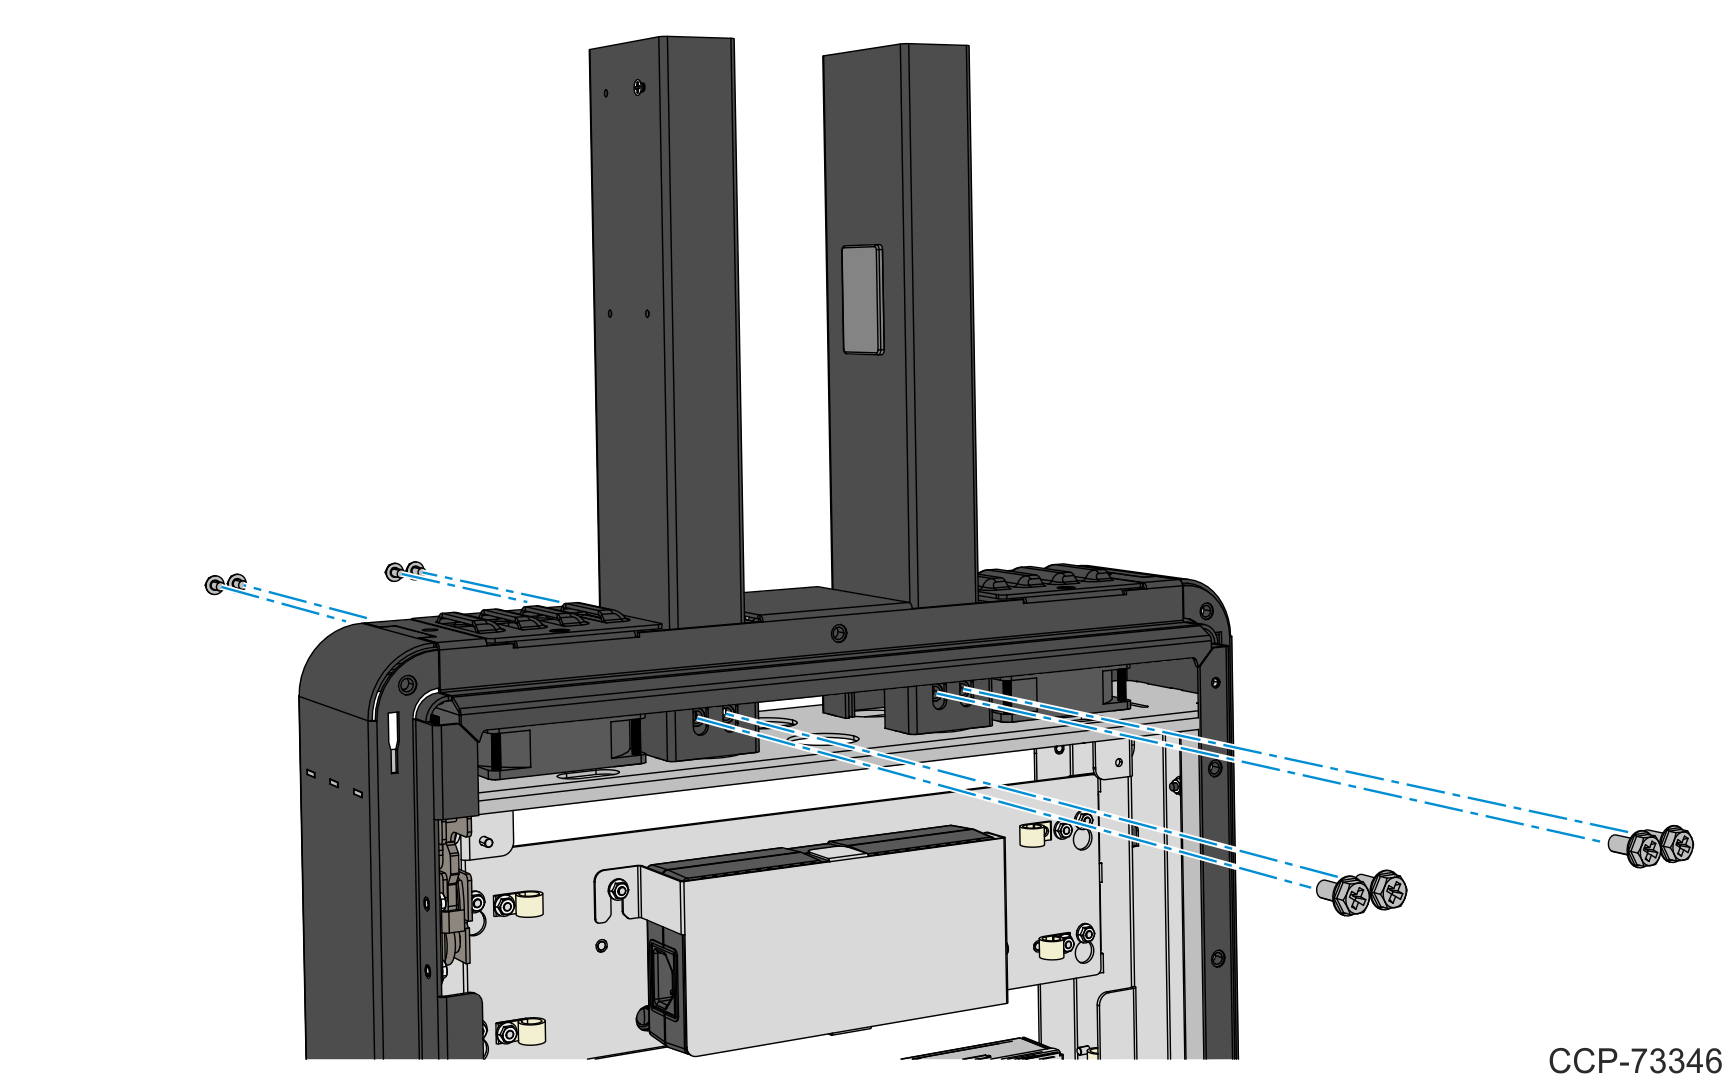
1.Install the Ceiling Posts to the kiosk.
a.Insert the Ceiling Posts into the Main Frame.
b.Secure the Ceiling Posts to the cabinet using four M6 hex head screws for each post.
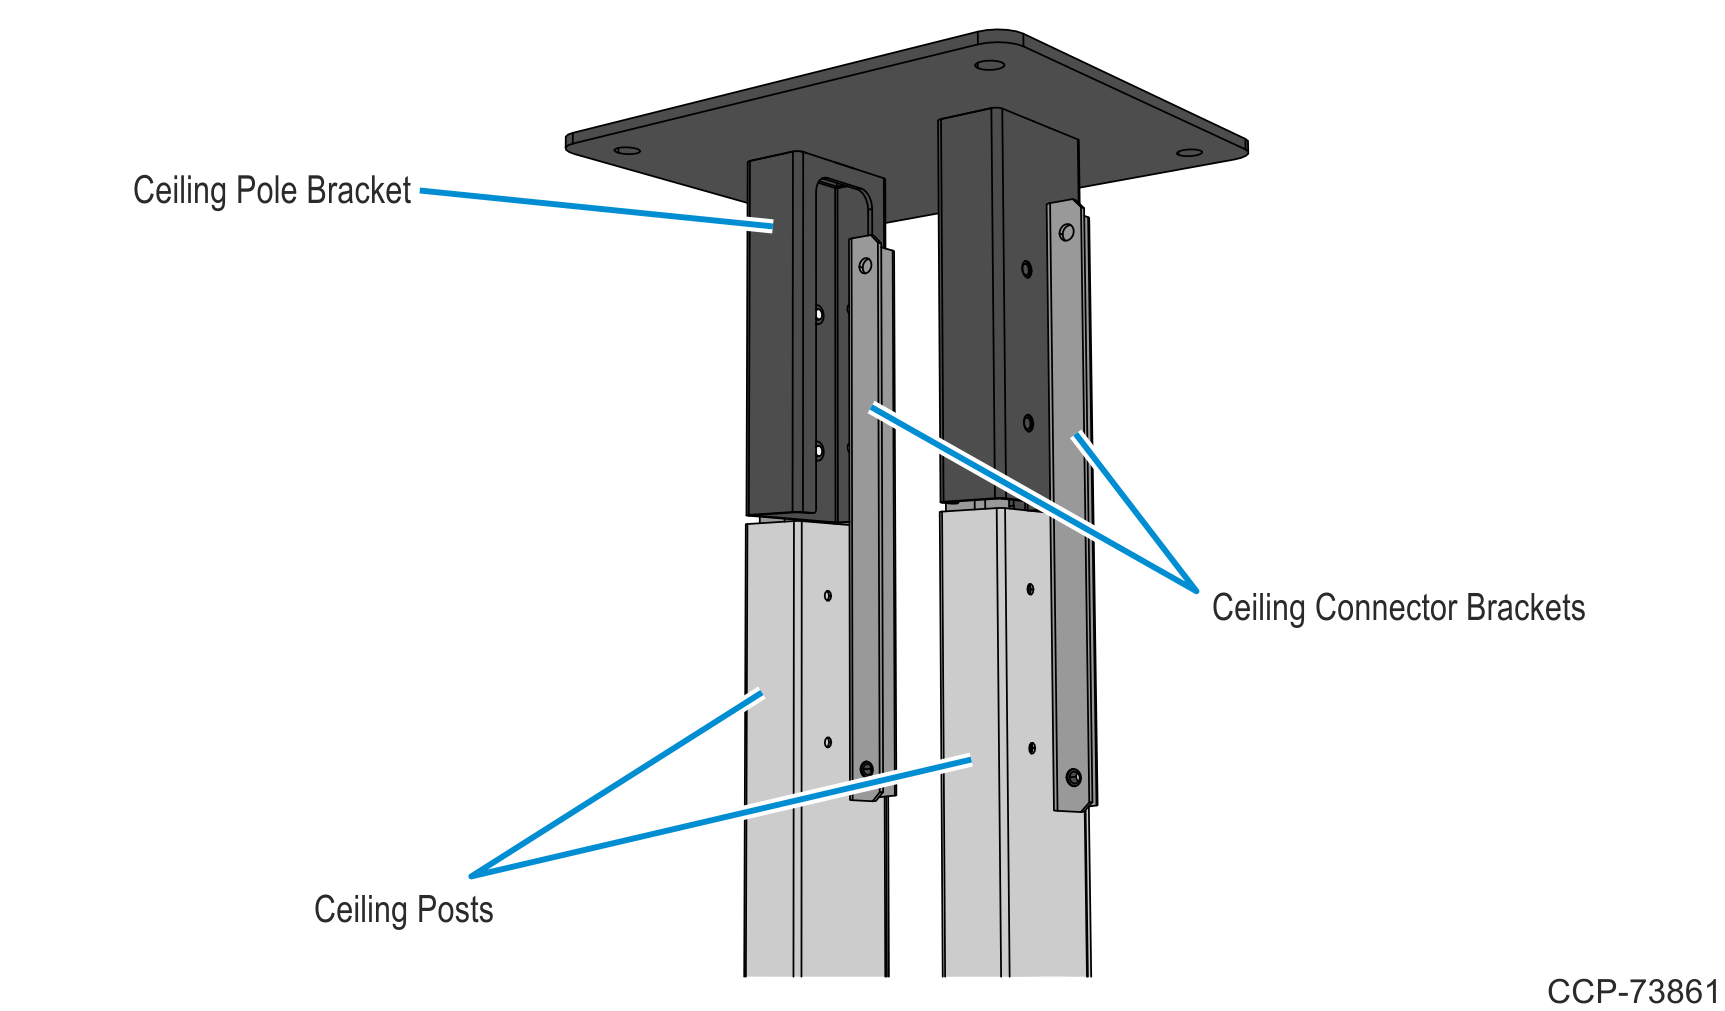
2.Mount and secure one side of the Ceiling Connector brackets to the Ceiling Pole Bracket.
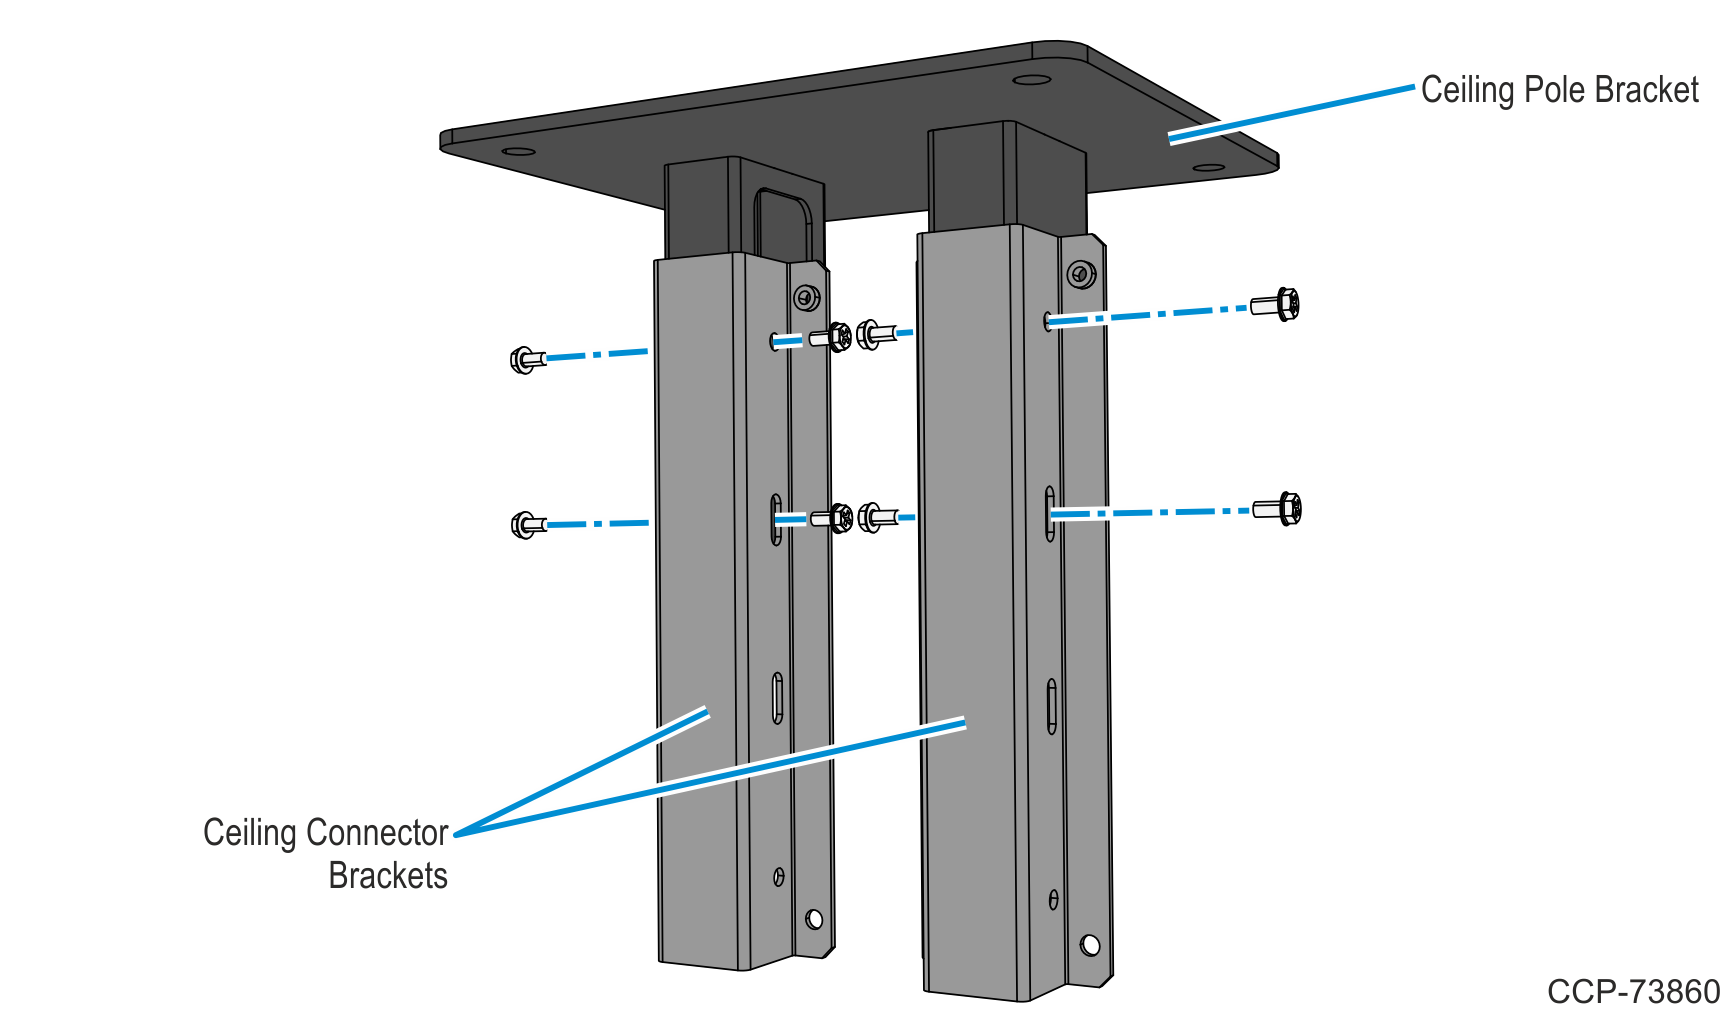
3.Position the Ceiling Pole Bracket assembly at the top of the Ceiling Posts.
a.Insert the Ceiling Posts into the Ceiling Connector brackets.
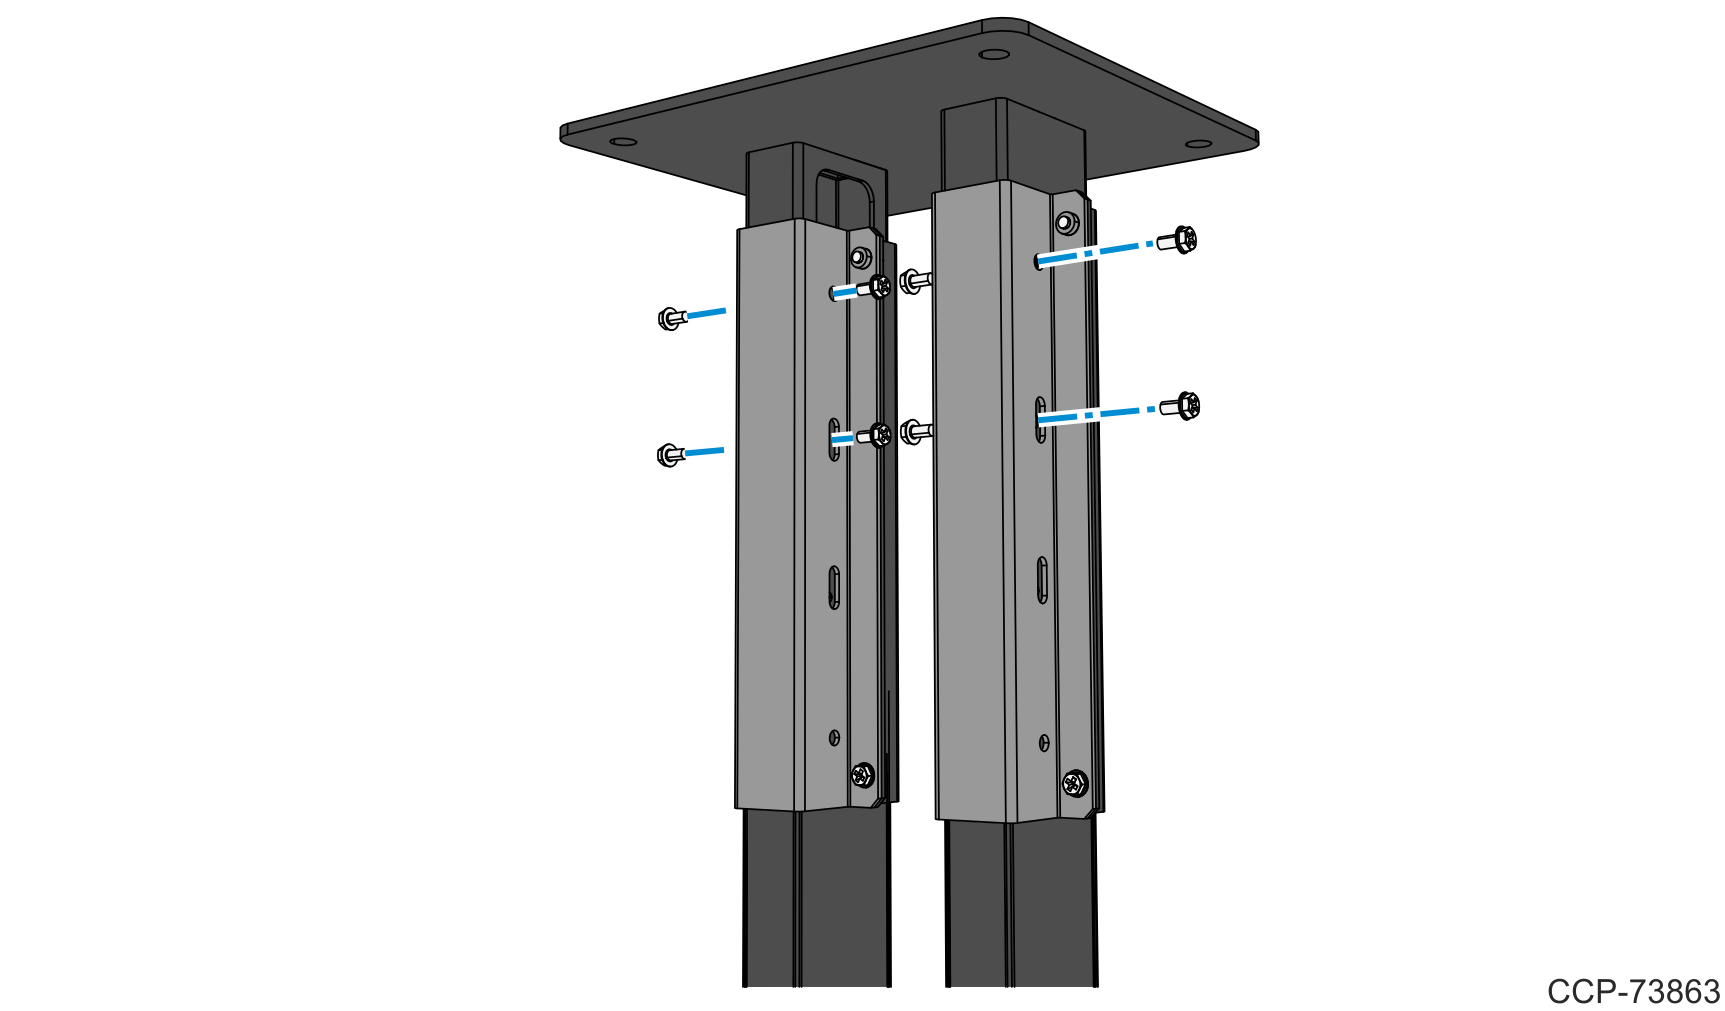
b.Mount the second side of the Ceiling Connector brackets and secure these using two screws to their opposite connector bracket.
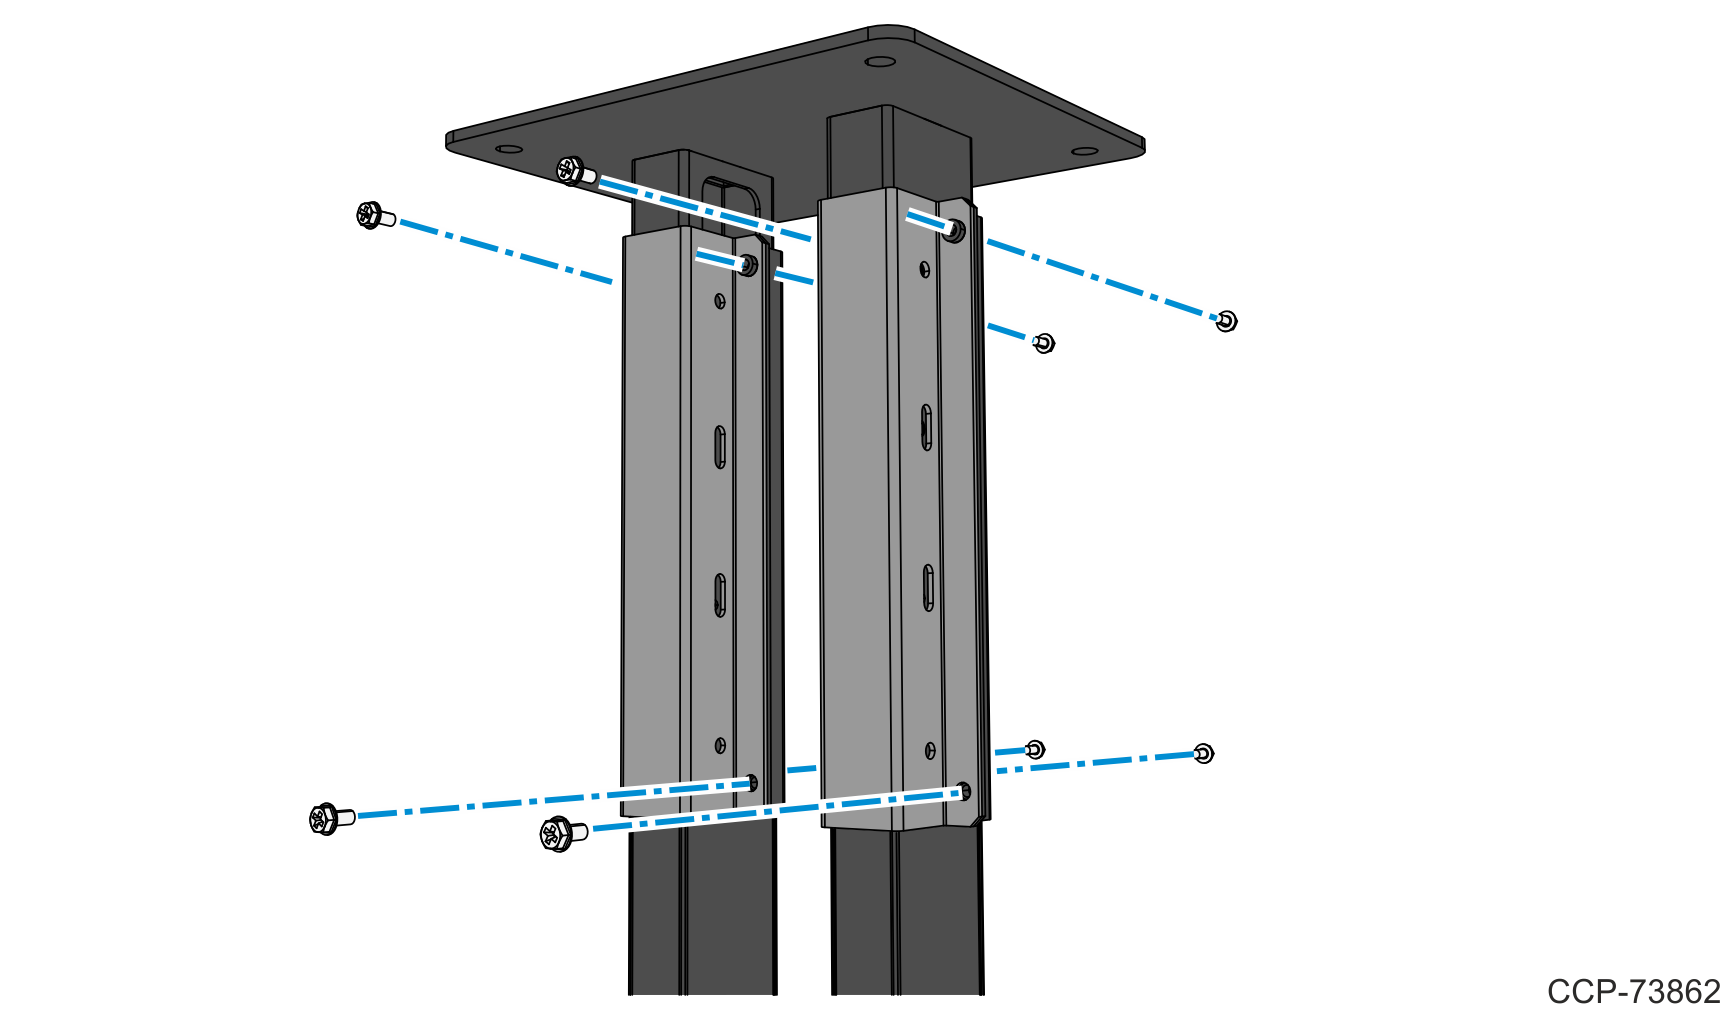
c.Secure the second connector bracket sides to the Ceiling Pole Bracket using four screws each.
4.Hold the Ceiling Mount against the Concrete Ceiling slab and then mark the following mounting holes:
a.Four mounting holes on the concrete ceiling.
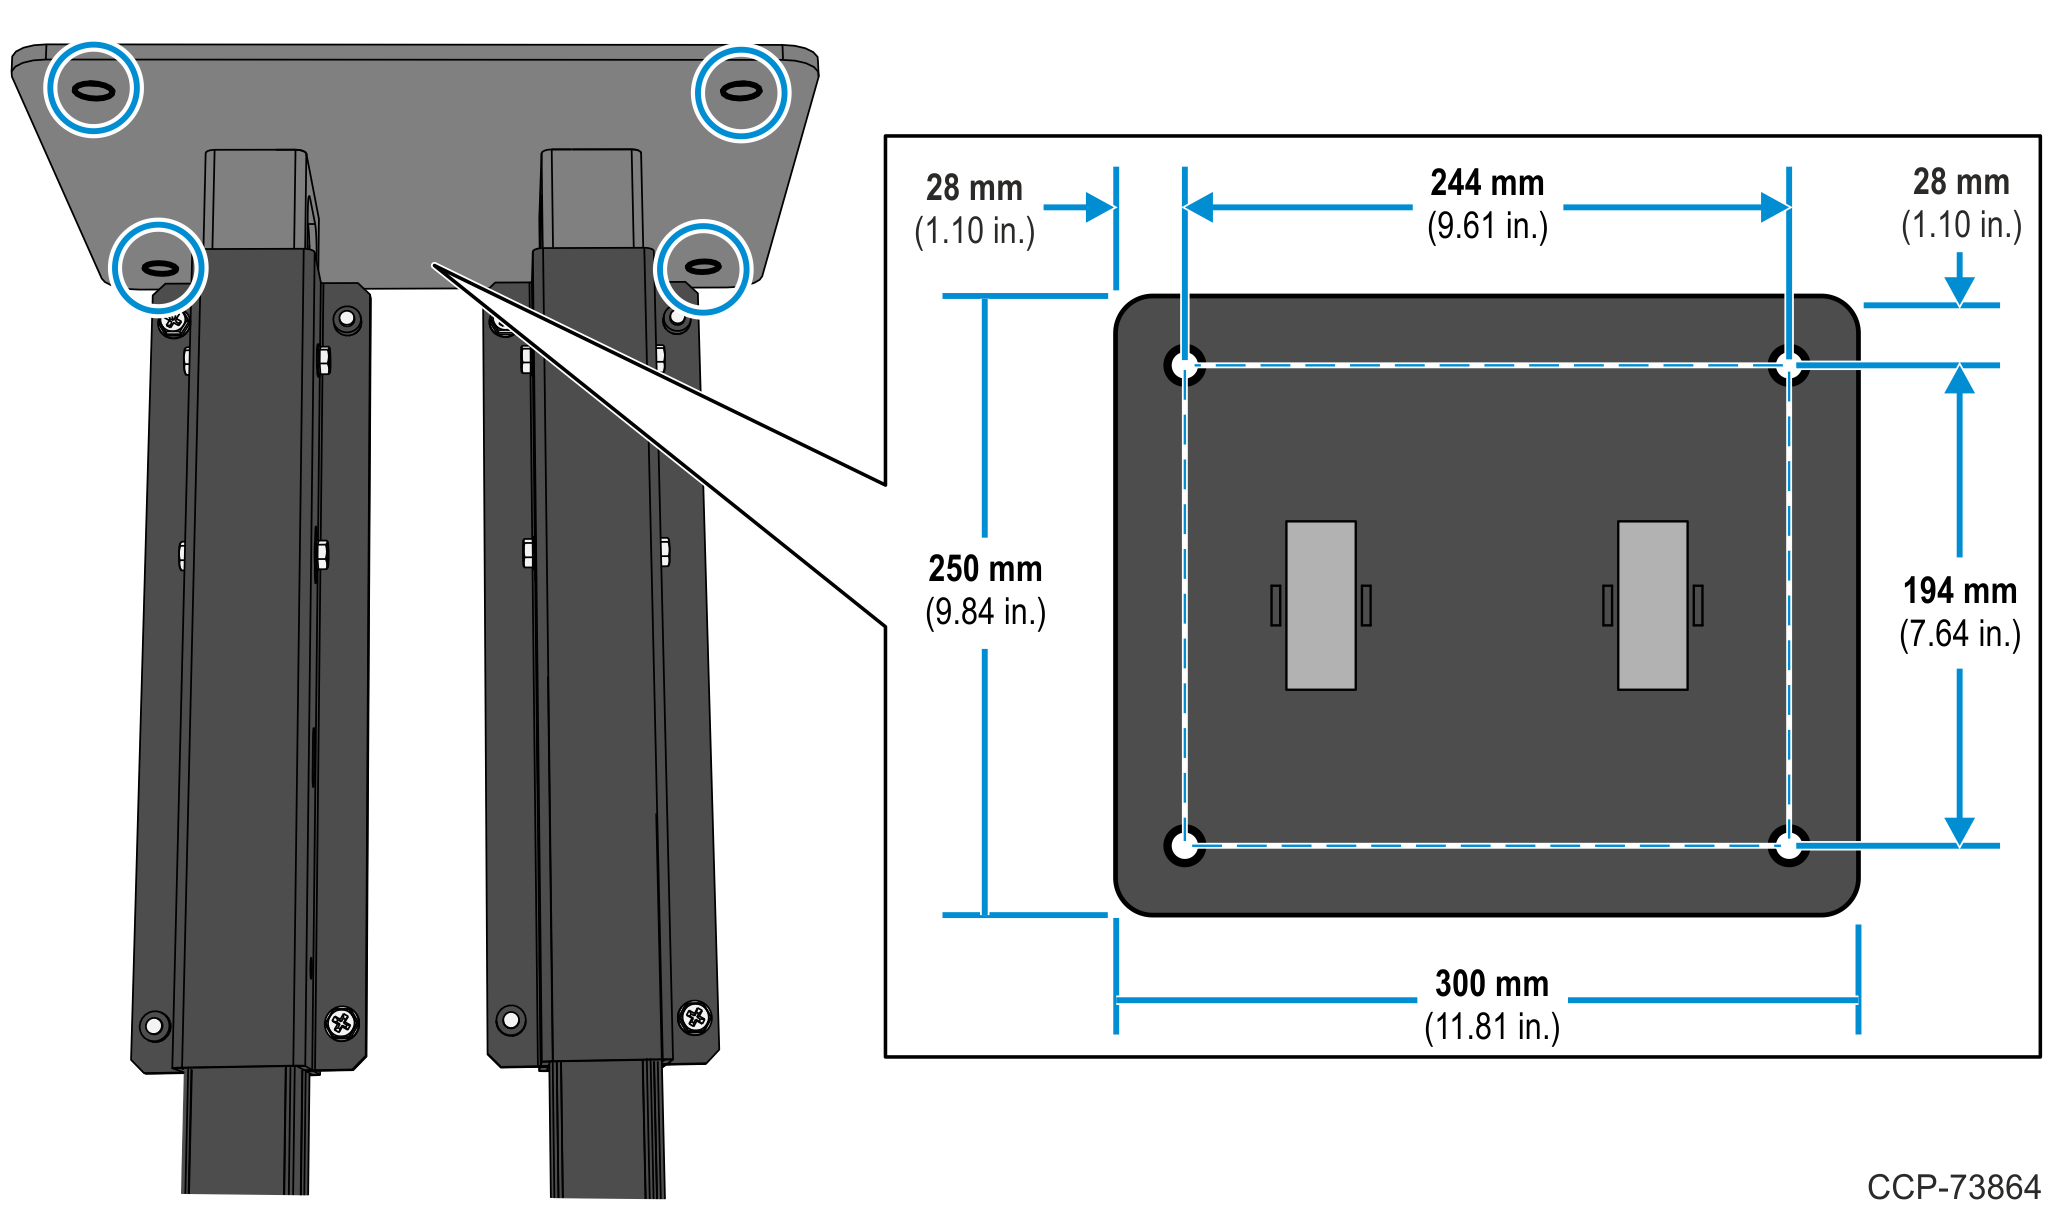
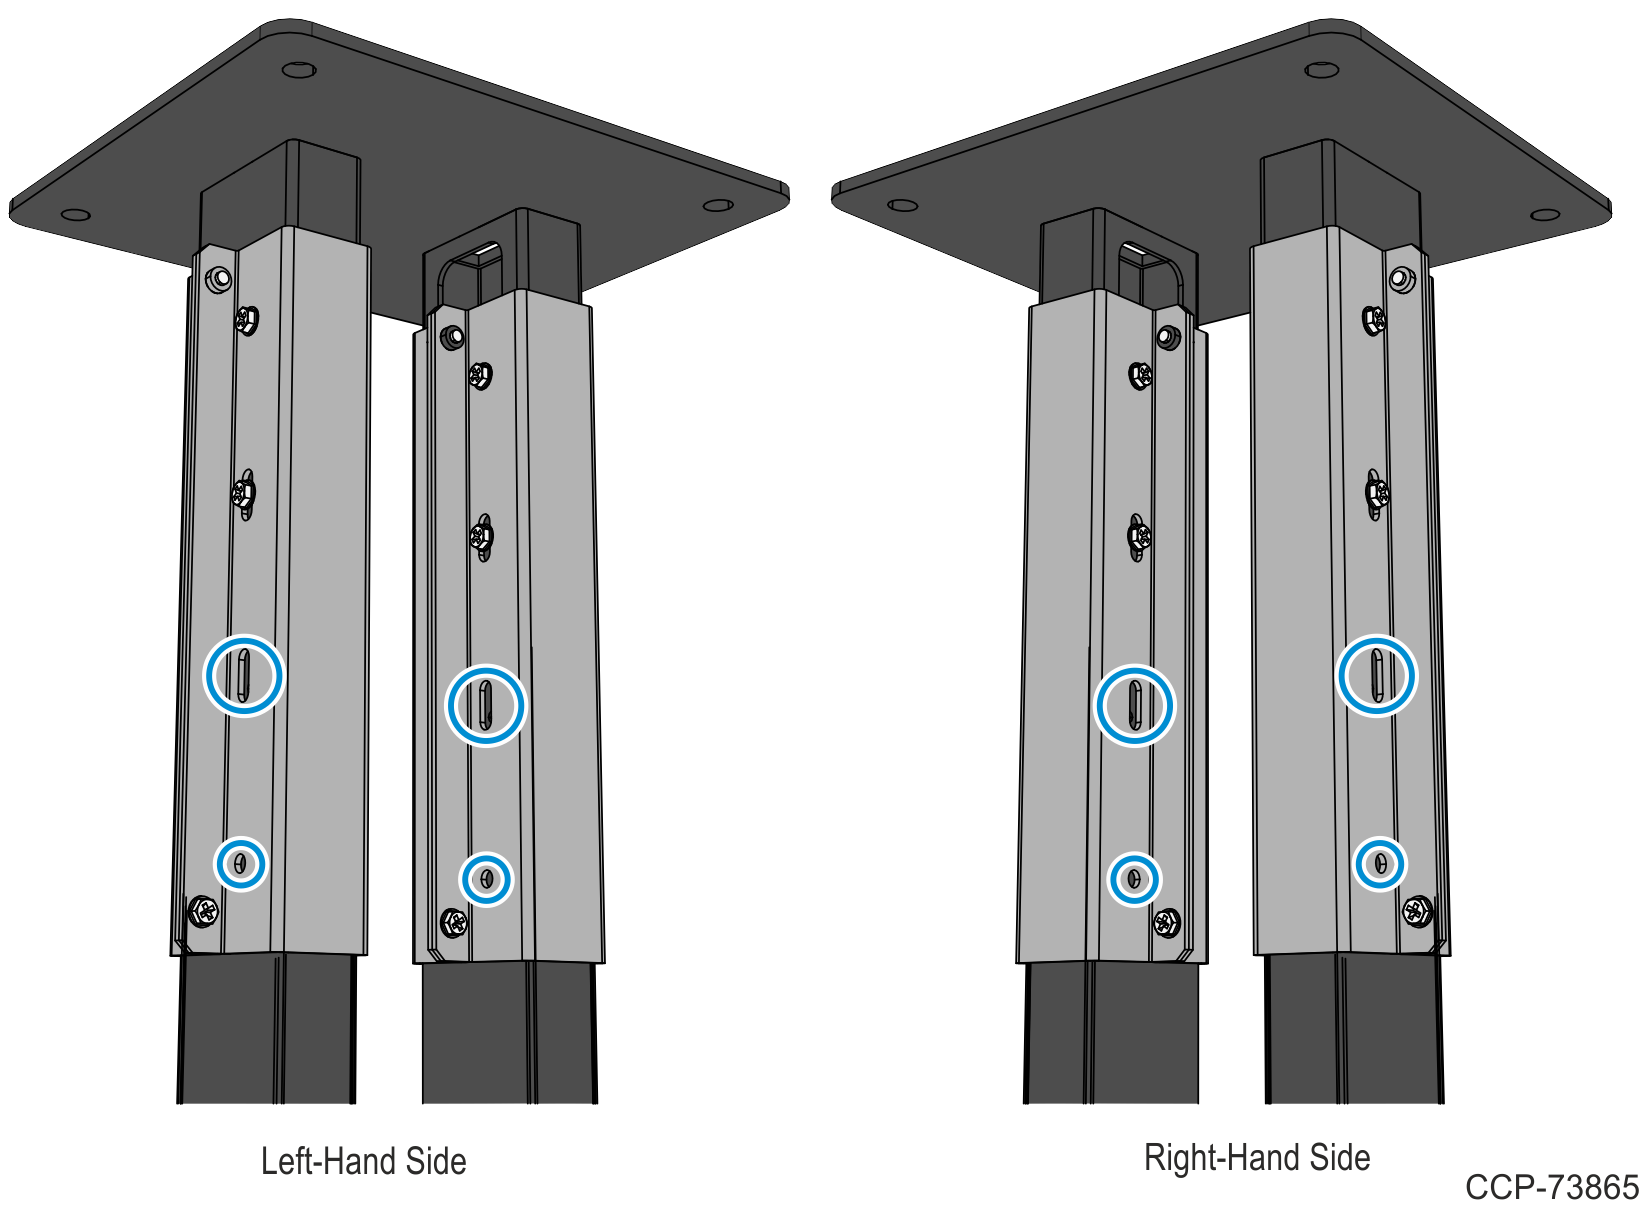
b.Eight mounting holes on each of the Ceiling Post for the Ceiling Connector Brackets.
5.Remove the Ceiling Pole Bracket and Ceiling Connector Brackets from the Ceiling Posts.
6.Remove the Ceiling Posts from the Kiosk.
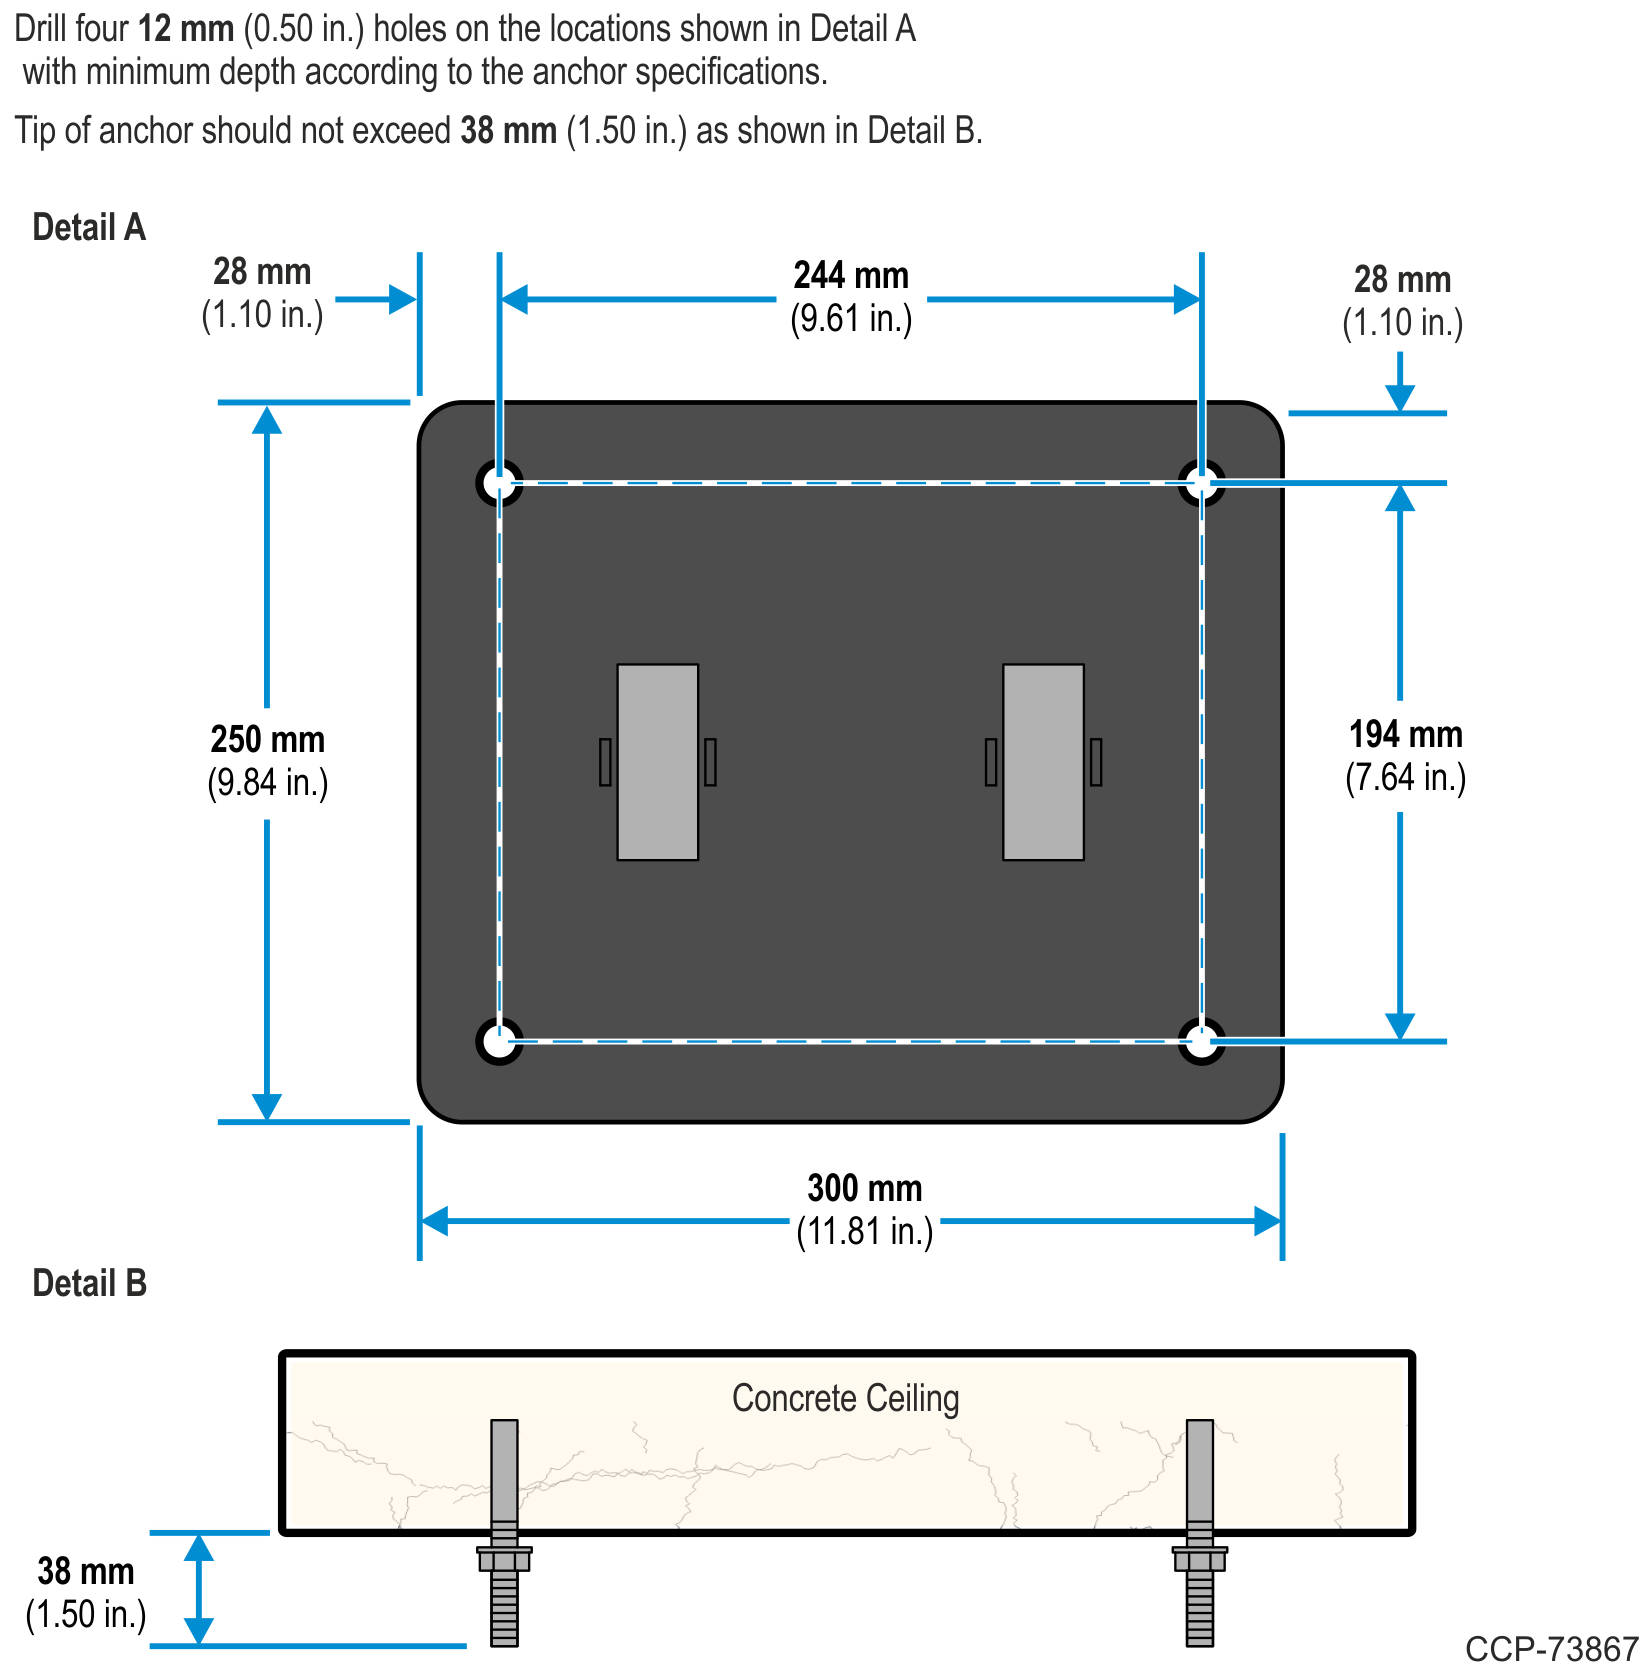
7.Drill the four mounting holes on the ceiling and install the four anchors.
a.Cover the kiosk to protect it from dust and debris.
b.Drill four 12 mm (0.5 in.) holes over the marked mounting holes on the ceiling.
c.Install four anchors into the drilled mounting holes. Make sure that the tip of the anchors does not exceed 38 mm (1.50 in.) from the ceiling surface.
8.On each Ceiling Post, drill eight 3 mm (0.12 in.) mounting holes on the marked locations for the Ceiling Connector brackets.
